Saturday, August 30, 2014

Cook: Shepherd's Pie (Chicken Version)


Chicky Shepherd's Pie
Kid's version
Difficulty: 3/5

Made Shepherd's Pie last Friday for the kiddos. I had quite a fair amount of potatoes lying in my fridge for quite sometime so decided to make something to use them up. Chance upon a Shepherd's Pie recipe online (Shepherd's Pie Recipe) so decided to give it a try. 

I made some adjusted based on the ingredients that i have.. it turns out to be a super success!!! My 21 months old son had 3 servings and my 3 years old daughter had 1 1/2 servings (she prefer the fruit salad more, haha, she is more of a fruits and dessert person). When i bring back to my in-law house, my MIL and BIL all give thumbs up!! 

My mashed potato ration to meat is about 50:50. For those who doesn't want so much potatoes, can cut down the amount of mashed potato portion accordingly!

INGREDIENTS:
(Serves 3)
Fits into a 22cm X 11cm baking tray

Mashed potato layer
1. 400g of potatoes, peel off skin and cut into small cubes
2. 1/4 cup of fresh milk
3. 25g of butter
4. 1/2 teaspoon of salt
5. 1/4 teaspoon of ground black pepper
6. 1 egg yolk

Meat layer
1. 2 tablespoon of olive oil
2. 1 small onion, peel skin and minced
3. 50g carrot, peel skin and cut into small cubes
4. 2 cloves of garlic, minced
5. 350g of chicken breast, minced
6. 1/2 teaspoon of salt
7. 1/4 teaspoon of ground black pepper
8. 1 tablespoon of all purpose flour
9. 2 tablespoon of tomato sauce
10. 1 cup of chicken broth (for healthier version, you can substitute this with home cook chicken or vegetable soup)
11. A handful of frozen corn
12. 1 tomatoes, remove seeds and cut into small cube

Ingredients for the meat layer
METHODS:

1. Steam the potatoes till soft, mashed using fork and set aside.

Little chef at work-helping to mash potatoes
2. Heat up 1 tablespoon of olive oil in a pan, add onions, carrots, corns and garlic. Stir fry for 2-3 minutes.
3. Put them at the side of the pan, then add 1 tablespoon of olive oil in the middle of the pan.
4. When the oil is heated up, add chicken, salt and black pepper. Stir fry until the meat is cooked on the outside (turn white), it will take about 2-3 minutes.
5. Sprinkle the all purpose flour on the meat, toss to coat and cook for 1 minute. Then mix the meat with the carrot mixture earlier. 
6. Add in tomatoes, tomato sauce and chicken broth. Stir to combine and bring to boil.

Combine all the ingredients and bring to boil.
7. Once boiled, reduce the heat to low and shimmer for 10 minutes until the sauce thickens (as shown in picture). Do not cover the pan with cover at this step. Taste the mixture and see if the taste suits your taste bud, if not add in seasonings as required.

Sauce thickens
8. Spread the meat mixture into a baking tray. 

Meat mixture in baking tray
9. In a clean pan, heat up milk and butter until well combine. 
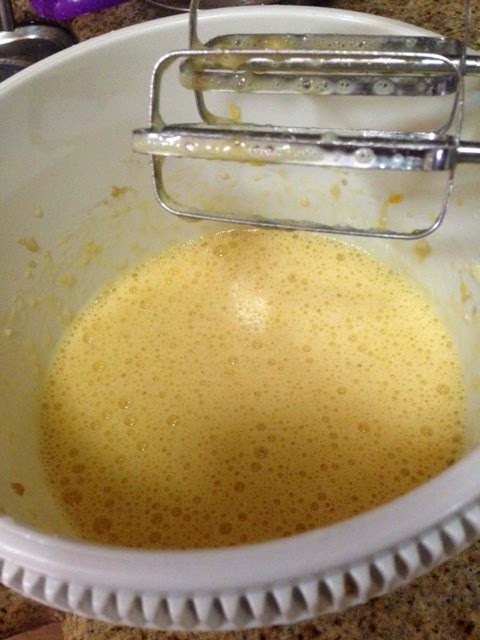
10. Add mashed potatoes, salt and pepper and stir well until combine.
11. Add in egg yolk and the mixture should looks smooth as shown in picture.

Smooth mixture
12. Top the meat layer with the mashed potatoes, spread them evenly and cover the sides of the pan using a spoon.

Smoothen up the sides so that the meat doesn't come up during baking
13. Bake in preheated oven at 200 degree celcius for 25 minutes or until potatoes has browned (as shown)
14. Remove from oven and let is cool down for 10 minutes before serving.
Done :)


Thursday, August 28, 2014

Play: Outing to SEA Aquarium and Lunch @ Din Tai Fung

We went to the SEA Aquarium during June School Holidays and didn't have time to sort out the photos until now... We ended up there by mistake.. another of my blur adventure...

The initial plan is to go Underwater World because I saw a promotion for June School Holidays.... Then somehow it got mixed up and we ended up at SEA Aquarium.. I can only blame both place to be at Sentosa and both is aquarium related attractions.. haha!

Anyway, in the end we visited SEA Aquarium and luckily there is also a promotion for DBS/POSB Card Members... Usual price for adult ticket is $38 per person. With DBS/POSB credit card, you get 2 tickets @ $50 ... and the promotion is until 30th September 2014. 


Well, muddle head mummy ended up bringing the kids to SEA Aquarium and the kids enjoyed themselves...


Upon entering, there is this exhibition part with some fake animals... actually this section is quite weird.. cause it doesn't fit the theme....well....

And then you will pass by some big ship etc... and then entrance to the aquarium..

Kids were fascinated and super excited to see the big tank... keep shouting "fish, fish!!!" so we just let them stick their face to the glass and enjoy themselves...while i snap photos of them!

Fascinated by the super big tank upon entrance!
Can really stay here for long...
I think they just stand there admiring the fish for 5 minutes or so, then mummy and daddy got bored so told them its time to see other part of the SEA aquarium.. if not, i think they can stay there even longer...

Ship wreck with fishes...

Next up is a tunnel with more fishes, around you and above you...
Entering the tunnel...

Puffer fish close up :)


 Then fishes appear below us... and the kids decided to get the best view by lying on the floor... smart little ones...

Lying on floor to admire the fishes..
Wow, a pretty starfish!

Starfish
I love the sea dragon.. they look so pretty!!!
Sea dragon
Nemo's friend...!!!!

And its feeding time.....


Face stuck to glass again!
Dolphin time... a few dolphin swimming around..


Their jelly fish display is quite pretty too! They have different colour lights ...red, blue, green, yellow ..etc

Red 
Yellow
Blue
White
Special type of jelly fish
Upside down jelly fish


And finally, one of the biggest tank i ever seen... with lots of fishes, from small fish to sting ray etc..


Sting ray!
There is also a restaurant inside the SEA Aquarium whereby you can dine while enjoying the view of fishes.. prices are reasonable, slightly on the steep side... but in the end, we decided to have our meal at Din Tai Fung.

Located at RWS, this Din Tai Fung's menu slightly differs from their usual branches...

Din Tai Fung
Cute kids plate, bowl, cup and cutlery..
This dish is exceptionally nice...it is one of their cold starter...Oriental salad in special vinegar dressing...

Oriental Salad in Special Vinegar Dressing, $4.50
Special Braised Beef Noodle Soup with Beef Brisket, soup base is nice and yummy but beef is normal.. next time i would order one of the options without beef, just the noodle and soup and it only cost $8.80, much cheaper than this version... :)
Special Braised Beef Noodle Soup with Beef Brisket, $12.80
Noodle in Fragrant Mushroom and Minced Pork Sauce...hubby says this is nice... the sauce goes well with the noodle..

Noodle in Fragrant Mushroom and Minced Pork Sauce, $9.80
This branch doesn't serve the usual "xiao long bao" that we liked so decided to try their Steamed Crab Meat and Pork Dumpling... well, still prefer the original version..but the mini orange crab is cute....

Steamed Crab Meat and Pork Dumplings, $10 for 6 pieces
Steamed chilli crab and pork bun.. this fare much better than the steamed crab xiao long bao... the crab is juicy and succulent :) thumbs up!

Steamed Chilli Crab and Pork Bun, $5.30 for 3 pieces
Steamed Glutinous Rice Cake Stuffed with Mashed Red Bean, i love this!!! It is chewy and you get red bean in almost every mouthful!!!

Steamed Glutinous Rice Cake Stuffed with Mashed Red Bean, $4.20 for 2 pieces
Fried rice with shredded pork and egg, kids enjoyed their staple rice as usual....

Fried rice with Shredded Pork and Egg, $10.50

We totally enjoyed the meal at Din Tai Fung....

But we got a shocked when we left the parking lot....cause the carpark charges are ridiculously expensive!!!! We went on Friday and we paid $20 for 4 hours worth of parking....

Do consider other mode of transport when visiting or be prepared to pay for the parking fees!!!

These are the carpark charges i copied from their website!

Carpark Charges

Monday - Thursday (excludes Public Holidays):
7am to 7pm: $7 for 1st hour, $1 subsequent half hour or part thereof
After 7pm: $6 per entry
Maximum: $28 per 24 hours

Friday/Saturday/Sunday/Public Holiday:
7am to 7pm: $8 for 1st hour, $2 subsequent half hour or part thereof
After 7pm: $8 per entry
Maximum: $28 per 24 hours

Tuesday, August 26, 2014

Cook: (For Banana Lovers) Low Fat Low Sugar Banana Cake


Difficulty: 3/5

After my last successful attempt on low fat low sugar banana cake, today decided to give it another try and this time round, i increase the amount of banana by 50% cause hubby is a super banana fan and he commented that the cake will be nicer with more bananas :) 

I also further reduce the sugar due to the higher banana ratio as the bananas are quite sweet!

Indeed, the cake turns out to be yummy! For this is the recipe for all banana lovers out there!

For those who just wanted a mild banana taste, this is the previous recipe link: http://eatplaycook22.blogspot.sg/2014/06/cook-low-sugar-low-fat-banana-cake.html

INGREDIENTS:
(Make one 9 inches square cake)

1. 3 medium sized eggs
2. 40g brown sugar
3. 315g of ripe banana (i used 3 large bananas)
4. 180g cake flour
5. 0.6 teaspoon of baking powder
6. 0.3 teaspoon of bicarbonate soda (baking soda)
7. 70g of vegetable oil


METHODS:

1. Sieve flour, baking powder and bicarbonate soda and set aside.
2. Whisk eggs, brown sugar and banana at high speed until the mixture double its initial amount, turns from bright yellow to pale yellow and the mixture is thicker than initial stage (as shown in picture). It is similar to a ribbon stage whereby you can see ribbon forming when you whisk.

Initial stage when all ingredients just combine together..(after 1 minute of whisking)
Continue whisking until the amount doubled, ribbon stage and colour changes to pale yellow as shown
3. Fold in the flour mixture using a spatula.
4. Add in oil and mix well. The mixture should turn glossy at this point. 
5. Pour into baking tin lined with baking paper and bake in preheated oven 160 degree celcius for 30-35 minutes ( i used 33 minutes) or until fork comes out clean when poke into cake and the top turn brownish.

Ready to go into oven
6. For decoration, i place one cookie cutter on top of the cake, dust some icing sugar and garnish with some fresh fruits. Pretty and yummy!
Some decoration to make the cake more appealing :)