Showing posts with label Healthier Version Recipe. Show all posts

Monday, April 27, 2015

Cook: Healthier Choice Breakfast-Overnight Oats

Healthy Overnight Oats

I know I am totally out-of-date. The "hype" on overnight oats has died down and now here I am, starting to get addicted to it. I must say this is really a brilliant idea (whoever that thought of it). It is healthy and definitely fill the stomach better than usual breakfast. I could have a hearty breakfast (bread, sausages, egg) but doesn't retain the "fullness" as much as the oats. Definitely a good choice for diabetic patient as energy is released slowly rather in a short burst...

It is rather easy to make, just need to spend 15 minutes the night before and you can just take them out from the fridge and enjoy them in the morning. Nowadays, I make this as breakfast every 2-3 days and indeed is satisfying. Add in your favourite fruits, dried fruits or nuts and make a variety.

INGREDIENTS:
(Serves 2)

1. 8 tablespoons of instant oats (I used Quaker brand, any brand should do as long as the instant type)
2. 8 tablespoons of plain yogurt
3. Half a cup of fresh milk (or any amount to reach desired consistency)
4. 2-3 types of cut fruits (favourite fruits preferably the juicy type-orange, kiwi, blueberry, raspberry, strawberry, passion fruits, banana, mango)
5. Dried fruits (raisins, cranberry) or nuts or chocolate or a mixture of those (as desired)

METHODS:

1. Prepare the cut fruits into bite size
2. Mix the oats, yogurts and fresh milk

Mixing Oats with yogurt and fruits
Add fresh milk to reach desired consistency
3. Add in some of the cut fruits (mini sizes-eg: passion fruits, mashed kiwi etc) and mix well
4. Add a layer of bite-size fruits at the bottom. Top with a layer of oats mixture, then another layer of another type of bite-size fruits and a layer of oat mixture.
5. Finally, top with dried fruits or nuts or chocolate or a mixture of those.
6. Keep in fridge overnight.
7. The next morning, give the whole thing a good mix using spoon and serve :)
8. Enjoy!

Thursday, October 2, 2014

Cook: Ice-Cream Cheesecake (No Added Sugar)

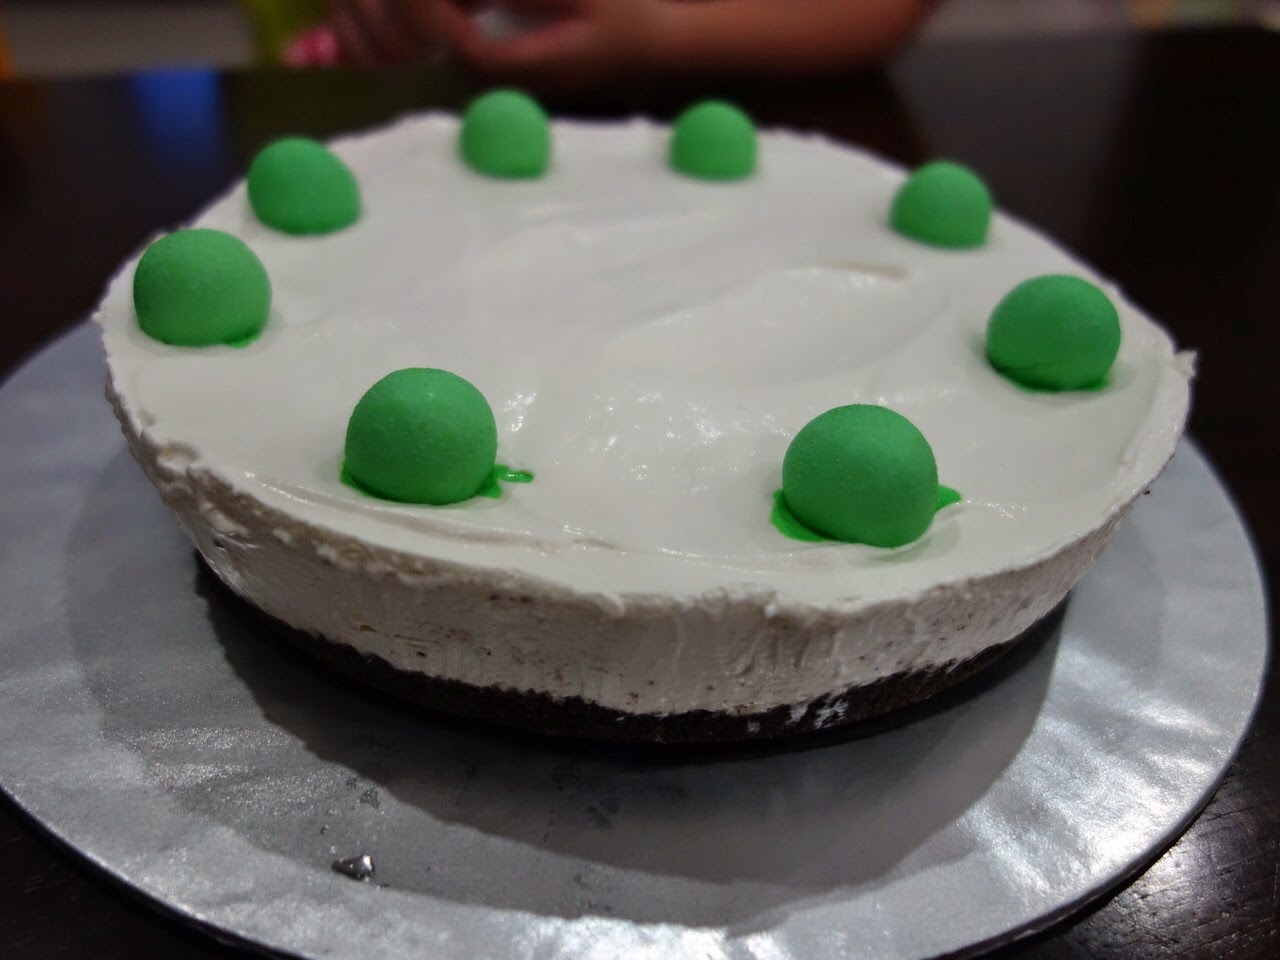
Ice cream cheesecake

Ice cream cheesecake
Last year, we ordered Swensen Ice-Cream Cake for hubby for his birthday. He only like the football design one which is 2kg, as we didnt have so many people to help finish his "football" cake this year, i decided to make him a small ice cream cake instead...Luckily he says it is nice.. of course, i wouldnt ask him how is the taste compared to Swensen.. hehe...

INGREDIENTS:
(Make one 8 inches round cake)

1. 14 chocolate Oreos biscuit and 5 McVites biscuit
2. 50g butter
3. 250g cream cheese
4. 300g whipping cream (i use Redman brand)
5. 1/2 teaspoon of vanilla extract
6. Orange juice (from one orange)-- this is optional, cause i can't taste any orange flavour in the final product
7. Chocolate pieces for fillings and topping (can use any normal chocolate that you like)

METHODS:

1. Crush the Oreo biscuit and McVites biscuit using roller pin or blender. (Use blender to achieve a more fine crumbs)
2. Melt the butter over a pan, and add into the crushed biscuit. Mix well and compact them.
3. Place it into the fridge for 2-3 hours until it harden.
4. Whip the whipping cream until medium peak as shown in photo. Set aside.

Medium peak
Set cream aside while preparing cream cheese
5. Cream the cream cheese and vanilla extract until smooth and well combine.
6. Add in the whipped cream bit by bit, mix well using mixer after each addition.
7. Add in the orange juice (if using) and mix well.
8. Spread the mixture into your tray on top of the biscuit. Cover the sides too (as shown), so that the chocolate layer won't be visible outside the cake.

Cover the sides of the tray.
9. Add a layer of your favourite chocolate in the middle.
Add chocolate
10. Top the cake with more cream cheese mixture. Decorate with your favourite fruits or chocolate.
11. Freeze them for 2-3 hours and it is ready to eat :)
12. Enjoy!
The outside... 

The inner layer...
The happy faces...

Wednesday, September 17, 2014

Cook: Mini Milk Cookies- Great as Snack For Kiddos

Mini Milk Cookies
Second attempt: Yummy three flavours mini milk cookies
Made some little cookies for the kiddos to munch today. These cookies are more of the crunchy type (not melt in the mouth type) so would be more suitable for kids 1 year old and above or at least those with teeth already, good for them to learn munching :)

It is nice to roll them into little ball shape, but after a while i get kinda frustrated cause the dough kinda dry up very quickly so it is hard to form the round little shape plus my 20 months boy keep messing around. Even my 3 years old who was helping me roll starts to get tired, so we decided to just cut them into small pieces without rolling. IT WORKS as well, although not as pretty.. well, depends how patient you are.. haha! 

For the icing sugar, you can omit if you want to, but i didn't cause it is minimal amount compare to the potato starch and i didn't want the cookies to taste too bland. I ate quite a few pieces of the biscuit myself and it is not sweet with the addition of the 30g sugar, you can reduce or omit as required.

My kiddos love them and keep requesting for more... yum! Great as snack for them to munch away....

UPDATED: We finish them in 5 days so definitely good for at least 5 days, may be able to last longer but we wouldn't know cause it is all in our stomach already :p

Second attempt: Made a three flavour second batch of the cookies by adding matcha powder and cocoa powder into the dough....

INGREDIENTS:
(Made about 120 mini biscuits, fits into one medium sized tupperware)

1. 200g of potato starch
2. 55g of milk powder ( I use the kiddo's formula milk powder)
3. 30g of icing sugar (can omit if doesn't want your kids to take any sugar)
4. 1 medium sized egg (at room temperature)
5. 1/4 teaspoon of baking powder

METHODS:
1. In a clean mixing bowl, beat the egg and the icing sugar until well combine using a mixer, it takes about 1-2 minutes.
2. Then add the milk powder and baking powder into the mixture. Combine with a spatula.
3. Slowly sieve in the potato starch into the mixture and combine using a spatula until it forms a workable dough. (Dont take the potato starch out from its packaging ahead of time cause it tends to stick to form a lump the longer it stays outside)

Lumpy potato starch
Workable dough-original flavour
Second attempt: Three flavours: Original, Green Tea and Chocolate
4. On a clean surface, take some dough and roll them into a cylinder shape, and cut into small pieces using a plastic knife (as shown).

Cut into small pieces
5. At this point, either roll them into mini ball or just place the little pieces onto a baking sheet. 
6. After a while, the dough will starts to get a little dry, making it hard to roll. Add a bit of water to the dough and continue to work on them.

Ready to go into oven
Second attempt: Ready to bake
7. Bake in preheated oven at 170 degree celcius for 12-15 minutes or until the cookies is slightly brown.
8. Take it out from the oven and let it cool down for 10-15 minutes and keep in airtight container.
9. Enjoy!

Out from the oven, can smell the milk-y 

Enjoy!

Tuesday, September 9, 2014

Cook: Marshmallow Chocolate Chunk Cookies (No added sugar)

Marshmallow chocolate chunk cookies
Made another batch of my "no added sugar" series cookies by making a variation. My last bake of Double Chocolate Chips Cookies with Marshmallow (http://eatplaycook22.blogspot.sg/2014/09/cook-double-dark-chocolate-cookies-with.html) was a hit with my MIL and SIL. MIL love it very much, she said very nice plus with no added sugar, she can eats them with less guilt. Even my SIL who doesn't usually eat cookies give thumbs up!

But my 2 kids and hubby weren't too keen with them. They commented the cocoa powder taste is too much for them, understandably cause kids usually prefer something more sweet and not so dark chocolate-y.

This time round, i omitted the cocoa powder, and use chocolate chunks instead as i ran out of chocolate chips. Hubby says "wow, this is so much better than the previous version". Even my kids ask for more :) It is a success!!! But the looks weren't too pretty this time, we were too greedy with marshmallow so the cookies kinda cracked during baking. Nevertheless, yummy!

INGREDIENTS:
(Made 15 cookies)

1. 1/4 cup of butter, softened at room temperature and a little more for greasing
2. 1 egg
3. 1/4 teaspoon of vanilla extract
4. 150g of all purpose flour
5. 1/2 teaspoon of baking soda (bicarbonate soda)
6. 1/8 teaspoon of salt
7. 1 cup of chocolate chunks (I use normal store bought chocolate with nuts and cut them into small chunks)
9. 1/4 cup of marshmallow (cut into small pieces using scissors)

METHODS:

1. Cream butter using a mixer until smooth. 
2. Add in egg and vanilla extract, mix well to combine.
3. Sieve flour, baking soda and salt.
4. Stir in the flour mixture into the butter mixture, combine well.
5. Mix in the chocolate chunks into the mixture.

Cookies dough
6. Place a baking sheet onto the baking pan, grease the baking sheet with butter.
7. Depending on the size of cookies intended, roll the dough into a small ball, make an opening and stuff 1-2 small pieces of marshmallow inside. Do not put too much marshmallow cause they will expand during baking.

Ready to go into oven
8. Bake in preheated oven at 190 degree Celcius for 10 minutes or until cookies is cooked.
9. Remove from oven and let it cool for 1 minute. Then transfer the cookies to cooling rack to cool down.
10. Enjoy!

Sunday, September 7, 2014

Cook: Kid's Version Spaghetti- Using Fresh Milk and Cheese Based Sauce


Sharing one of a pasta sauce variation for kids using fresh milk, cheese and shitake mushroom as sauce. It is more healthy than store bought pre packed pasta sauce and the ingredients are readily available.

If shitake mushroom is not available, it can be substituted with brown mushroom or button mushroom.

INGREDIENTS:
(Serves 2 kids , 3 years old and 21 months)

1. 50g spaghetti, break into small pieces
2. 8 shitake mushroom, cut to small pieces
3. A handful of chop broccoli and carrot (or other vegetable)
4. 3 cloves of garlic, minced
5. 2 slices of cheddar cheese
6. 200ml of fresh milk (full cream)
7. 3/4 tablespoon of butter (no need to be exact)
8. 1 tablespoon of flour
9. A pinch of ground black pepper (optional)
Chop ingredients
METHODS:

1. Boil a pot of salt water and cook the spaghetti until cooked.
2. Drain and run the cooked spaghetti under cold water, set aside.
3. Add butter into a heated pan, after butter is melt, add garlic, fry for 1 minute.
4. Add mushroom, fry for 1-2 minutes and add flour. Toss to coat the mushroom with flour.
5. Add fresh milk, bring to boil and add vegetables.
6. Let the sauce thickens and add the cheddar cheese and spaghetti. Stir well until combine.
7. Add a pinch of ground black pepper if required.
8. Serve hot.

Monday, September 1, 2014

Cook: Double Dark Chocolate Cookies with Marshmallows (No added sugar)

Crunchy on the outside, soft inside!
Difficulty: 3/5

Inspired by one of the post in Facebook SHC Group, decided to make some Chocolate Chips Marshmallows Cookies since I have a big packet of marshmallow lying around....

Plus, i love chewy cookies and always buy them at "Reduced to Clear" section in Sainsburry when I was studying in UK, so wanted to try and see if i can make some myself :)

Found one recipe online (Chocolate Marshmallows Cookies) and looks easy enough. As there are plenty of chocolate chips and marshmallows in the recipe, i omitted the sugars and it still tasted great! 

However, I did a mistake by not hiding the marshmallow inside the dough so after baking, the exposed marshmallow becomes quite crispy. Other than that, it was yummy! Will definitely make this again soon and i am gonna to hide all the marshmallow on my next attempt :)

INGREDIENTS:
(Made 15 cookies)

1. 1/4 cup of butter, softened at room temperature and a little more for greasing
2. 1 egg
3. 1/4 teaspoon of vanilla extract
4. 140g of all purpose flour
5. 10g of unsweetened cocoa powder
6. 1/2 teaspoon of baking soda (bicarbonate soda)
7. 1/8 teaspoon of salt
8. 2/3 cup of chocolate chips
9. 1/4 cup of marshmallow (cut into small pieces using scissors)

METHODS:

1. Cream butter using a mixer until smooth. 
2. Add in egg and vanilla extract, mix well to combine.
3. Sieve flour, cocoa powder, baking soda and salt.
4. Stir in the flour mixture into the butter mixture, combine well.
5. Mix in the chocolate chips and the marshmallow into the mixture.

Cookies dough
6. Place a baking sheet onto the baking pan, grease the baking sheet with butter.
7. Depending on the size of cookies intended, roll the dough into small ball, ensure that the marshmallow goes into the cookies and not on top of the cookies to ensure that the marshmallow will not get burn during the baking process.
Cookie dough ready to go into oven
8. Bake in preheated oven at 190 degree Celcius for 10 minutes or until cookies is cooked.
9. Remove from oven and let it cool for 1 minute. Then transfer the cookies to cooling rack to cool down.

Yum Yum!

Tuesday, August 26, 2014

Cook: (For Banana Lovers) Low Fat Low Sugar Banana Cake


Difficulty: 3/5

After my last successful attempt on low fat low sugar banana cake, today decided to give it another try and this time round, i increase the amount of banana by 50% cause hubby is a super banana fan and he commented that the cake will be nicer with more bananas :) 

I also further reduce the sugar due to the higher banana ratio as the bananas are quite sweet!

Indeed, the cake turns out to be yummy! For this is the recipe for all banana lovers out there!

For those who just wanted a mild banana taste, this is the previous recipe link: http://eatplaycook22.blogspot.sg/2014/06/cook-low-sugar-low-fat-banana-cake.html

INGREDIENTS:
(Make one 9 inches square cake)

1. 3 medium sized eggs
2. 40g brown sugar
3. 315g of ripe banana (i used 3 large bananas)
4. 180g cake flour
5. 0.6 teaspoon of baking powder
6. 0.3 teaspoon of bicarbonate soda (baking soda)
7. 70g of vegetable oil


METHODS:

1. Sieve flour, baking powder and bicarbonate soda and set aside.
2. Whisk eggs, brown sugar and banana at high speed until the mixture double its initial amount, turns from bright yellow to pale yellow and the mixture is thicker than initial stage (as shown in picture). It is similar to a ribbon stage whereby you can see ribbon forming when you whisk.

Initial stage when all ingredients just combine together..(after 1 minute of whisking)
Continue whisking until the amount doubled, ribbon stage and colour changes to pale yellow as shown
3. Fold in the flour mixture using a spatula.
4. Add in oil and mix well. The mixture should turn glossy at this point. 
5. Pour into baking tin lined with baking paper and bake in preheated oven 160 degree celcius for 30-35 minutes ( i used 33 minutes) or until fork comes out clean when poke into cake and the top turn brownish.

Ready to go into oven
6. For decoration, i place one cookie cutter on top of the cake, dust some icing sugar and garnish with some fresh fruits. Pretty and yummy!
Some decoration to make the cake more appealing :)

Friday, August 15, 2014

Cook: No Bake Mini Oreo Cheesecake (No Added Sugar)


Oreo Cheesecake
My attempt of decorating... hehe.. looks funny!
Difficulty: 2/5

One block of the cream cheese that I bought during a promotion few months back is expiring soon, so  I look at my existing food supply and decided to make Mini Oreo Cheesecake.

As it is a relatively easy cake to make, it is also a good chance to involve my kids during the assembling. It can helps them to learn follow instructions and help them to practice their motor skills.
Kiddos' version
Kiddos' version-side view
I made use of my muffin tray to mould the Mini Oreo Cheesecake.

INGREDIENTS
(Make 8 Mini Oreo Cheesecake)

1. 24 Oreo Chocolate Cream Biscuit Crumbs (Crush into crumbs by placing the Oreo into plastic bag and crush using rolling pin)
2. 50g of butter
3. 250g of cream cheese, soften to room temperature
4. 1/3 teaspoon of vanilla extract
5. 200g of whipping cream
6. 9 Oreo Biscuit (Remove cream in middle, and break into medium pieces)

METHODS:

1. Place 1 1/2 tablespoon of Oreo Crumbs into each muffin hole.
2. Melt butter and place 1 tablespoon of melted butter into each muffin hole.
3. Mix well, and press down the biscuit mixture using the back of a spoon.
4. Chill in fridge for at least 1 hour.
5. Whip the whipping cream using mixer until medium peak. Set aside.
TIPS: Use high speed for 3-5 minutes or until the cream thickens, then reduce to low speed until it reached medium peak. This is how it will looks like: Medium Peak Whipped Cream.
6. Mix the cream cheese and vanilla extract until it is well combine.
7. Add the whipped cream into the cream cheese mixture and mix well for 1-2 minute until the mixture looks smooth. Do not over mix.
8. Add half cup of the Oreo Crumbs and all the Oreo biscuit pieces into the mixture. Fold in until just combine.
9. Scoop the mixture into the muffin hole and smooth the top using the back of a spoon.
10. Sprinkle the remaining Oreo Crumbs onto the top.
11. Chill in fridge overnight or at least 4 hours.
12. Serve chill.

Yummy!

Tuesday, June 10, 2014

Cook: Low Sugar Low Fat Banana Cake

Low Sugar Low Fat Banana Cake
Difficulty: 3/5

Few days back hubby bought a bunch of banana and today they suffered a mishap.. Usually my kids will go and fiddle around with them and then the banana will drop on the floor but today i think the banana are too ripe and the wind is too strong, so 4 of the remaining banana drop on the floor... And so they ended up in my oven!

Found this recipe online and i adapted it to make a low fat low sugar version.

INGREDIENTS:

1. 5 medium sized eggs
2. 80g brown sugar
3. 370g of ripe banana (i used 3 1/2 bananas)
4. 300g cake flour (You may substitute the cake flour with 263g of all purpose flour and 37g of corn starch)
5. 1 teaspoon of baking powder
6. 1/2 teaspoon of bicarbonate soda (baking soda)
7. 120g of oil 

METHODS:

1. Sieve flour, baking powder and bicarbonate soda and set aside.
2. Whisk eggs, brown sugar and banana at high speed until the mixture double its initial amount, turns from bright yellow to pale yellow and the mixture is thicker than initial stage (as shown in picture)

Before whisking
After whisking
3. Fold in the flour mixture using a spatula.
4. Add in oil and mix well.
5. Pour into baking tin and bake in preheated oven 160 degree celcius for 30-35 minutes ( i used 33 minutes) or until fork comes out clean when poke into cake and the top turn brownish.

Before baking
After baking with nice brownish colour