Showing posts with label Cake Recipe. Show all posts

Tuesday, June 18, 2019

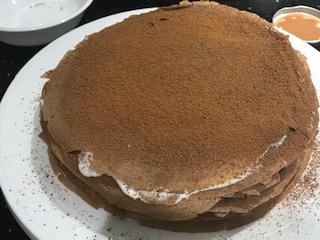
Cook: Chocolate Mille Crepe Cake


Chocolate Mille Crepe Cake
Mille crepe cake is one of my favourite and ever since I tried it at Maco Bakery in Skudai, Johor, Malaysia, I always find myself went back for more. Ever since I moved to Dubai, I have yet found a nice mille crepe cake. It consists of 10-20 layers of thin layers crepe layered with whipped cream in between and tasted so heavenly. Although there are many times I search for its recipe but I have yet try to make them as I find it tedious to make the layers one by one. 

One fine day, I decided to go ahead and make them and I am enjoying a piece while typing out this blog. To be exact, it is my second piece today :P Time to go for exercise after this!

As it is my first attempt, I find the whipped cream layer is a little too thin for my taste bud. I am definitely going to increase the amount of whipped cream and spread a more generous layer for my next attempt but for now, I am going to enjoy this chocolate mille crepe cake.


Enjoying a slice now...
Mine made up of 18 layers and it is definitely a good size

INGREDIENTS (Makes one 8 inches crepe cake):

For the thin crepe layers:
1. 400ml of full fat fresh milk
2. 1 1/2 tablespoon of sugar
3. 3 large eggs
4. 25g of butter, melted
5. 1 cup of cake flour
6. 2 tablespoon of cocoa powder
7. 1/2 teaspoon of baking powder

For the fillings:
1. 240ml whipped cream or more according to taste. 
2. 1-2 tablespoon of sugar (if you like it to be sweeter)

METHODS:

1. Place the milk and sugar in a saucepan and heat it up on low heat. Slowly stirred until all the sugar is dissolved.
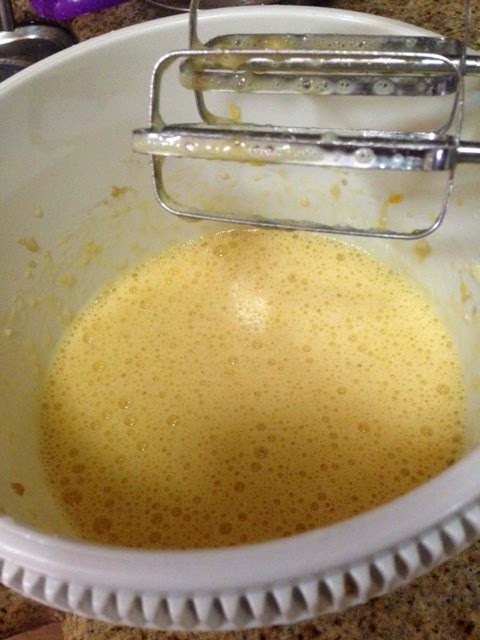
2. In a mixing bowl, beat the eggs and slowly add in the warm milk mixture. Whisk till combine. 

Beat the egg yolk
Add in warm milk/sugar mixture
3. Add in the melted butter, whisk to combine.
4. Next , sieve the cake flour, cocoa powder and baking powder into the mixture by batches and whisk to combine.
Sieve the cake flour mixture
5. The mixture should looks runny as shown.
6. Once ready, cover the mixing bowl with a cling film and place them in the fridge for an hour to let it settle down.
The batter should be very thin and flowy
7. Heat up cooking pan on low heat. Using a kitchen towel, spread a thin layer of cooking oil and pour the batter in. 
8. Cook for 1-2 minutes until the sides looks crispy. Using a spatula, flip the crepe. 
9. Once the crepe is cooked, remove and set aside to cool down.
10. Repeat until all crepes are cooked.
Make 18 layers altogether
11. Beat the whipped cream until stiff. Then assemble the crepe cake by putting a layer of whipped cream in between the crepe.
Spread whipped cream in between layers
12. Once it is done, sprinkle some cocoa powder on top and pop them into fridge overnight.
Ready to pop into the fridge
Sprinkle some cocoa powder on top
13. Serve chill :)


Thursday, October 2, 2014

Cook: Ice-Cream Cheesecake (No Added Sugar)

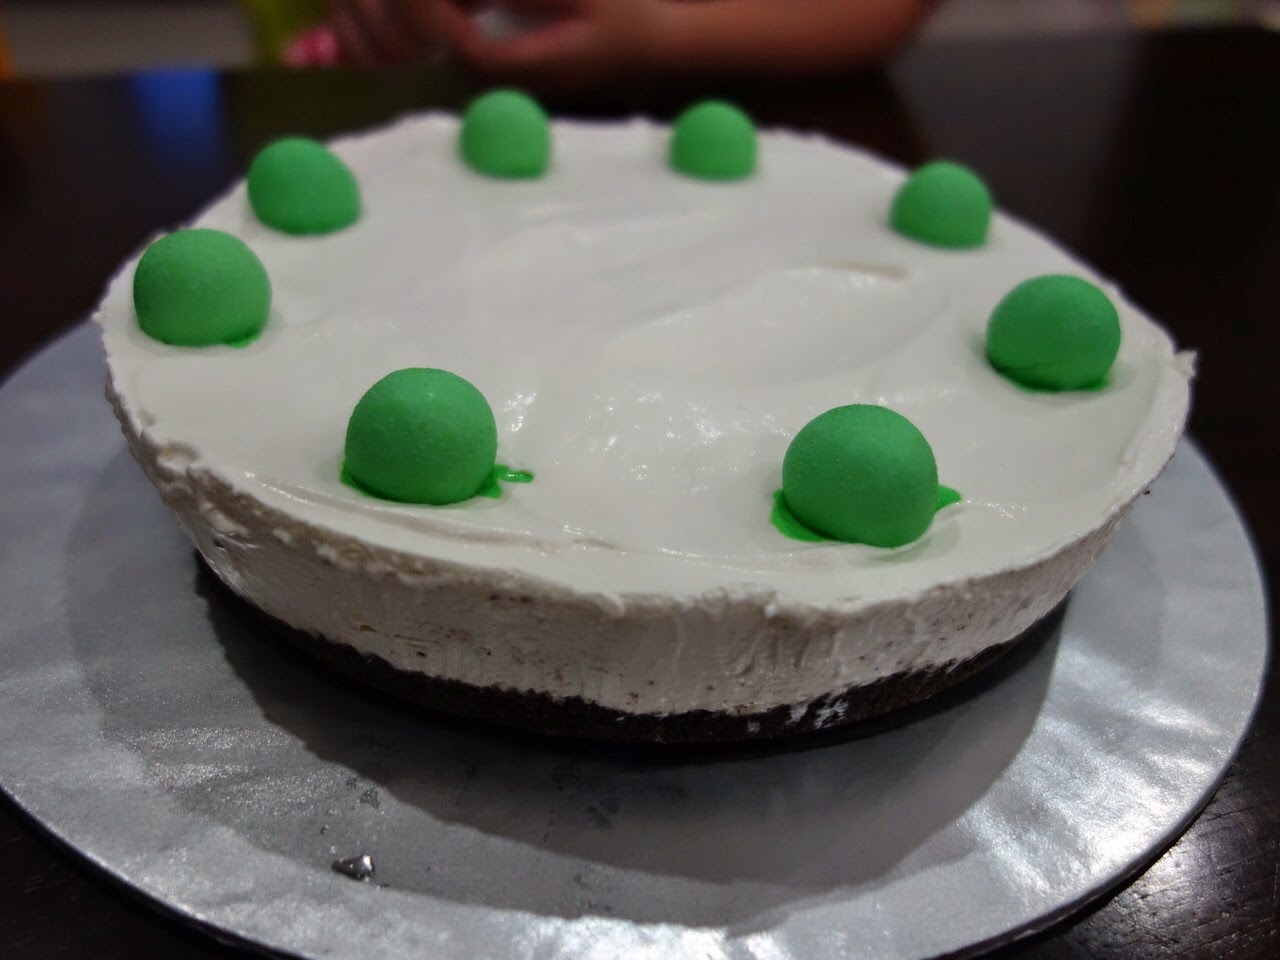
Ice cream cheesecake

Ice cream cheesecake
Last year, we ordered Swensen Ice-Cream Cake for hubby for his birthday. He only like the football design one which is 2kg, as we didnt have so many people to help finish his "football" cake this year, i decided to make him a small ice cream cake instead...Luckily he says it is nice.. of course, i wouldnt ask him how is the taste compared to Swensen.. hehe...

INGREDIENTS:
(Make one 8 inches round cake)

1. 14 chocolate Oreos biscuit and 5 McVites biscuit
2. 50g butter
3. 250g cream cheese
4. 300g whipping cream (i use Redman brand)
5. 1/2 teaspoon of vanilla extract
6. Orange juice (from one orange)-- this is optional, cause i can't taste any orange flavour in the final product
7. Chocolate pieces for fillings and topping (can use any normal chocolate that you like)

METHODS:

1. Crush the Oreo biscuit and McVites biscuit using roller pin or blender. (Use blender to achieve a more fine crumbs)
2. Melt the butter over a pan, and add into the crushed biscuit. Mix well and compact them.
3. Place it into the fridge for 2-3 hours until it harden.
4. Whip the whipping cream until medium peak as shown in photo. Set aside.

Medium peak
Set cream aside while preparing cream cheese
5. Cream the cream cheese and vanilla extract until smooth and well combine.
6. Add in the whipped cream bit by bit, mix well using mixer after each addition.
7. Add in the orange juice (if using) and mix well.
8. Spread the mixture into your tray on top of the biscuit. Cover the sides too (as shown), so that the chocolate layer won't be visible outside the cake.

Cover the sides of the tray.
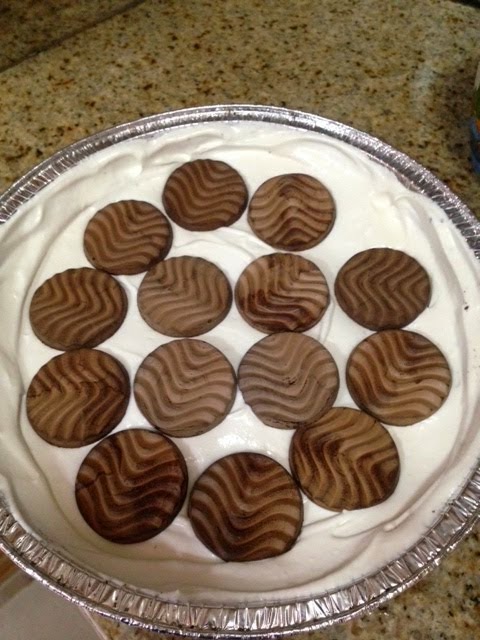
9. Add a layer of your favourite chocolate in the middle.
Add chocolate
10. Top the cake with more cream cheese mixture. Decorate with your favourite fruits or chocolate.
11. Freeze them for 2-3 hours and it is ready to eat :)
12. Enjoy!
The outside... 

The inner layer...
The happy faces...

Thursday, September 4, 2014

Cook: Hong Kong Style Ma Lai Gao (Steamed Egg Cake)

Ma Lai Gao :) Yum!
Soft and fluffy!
My second attempt-more soft this time
Difficulty: 4/5

I am in search for a Tim Ho Wan lookalike and taste-alike Ma Lai Gao recipe because it is my daughter's favourite dim sum! Everytime we visit she ate at least 2 servings and then will takeaway one piece home. Each piece cost $3.80 and it is certainly not cheap.

A lot of recipe that I find online doesn't require fermentation and after steaming, it certainly doesn't look like the one at Tim Ho Wan. Not sure whether it taste alike but the look definitely doesn't. If i were to serve that to my daughter, don't think she can relate to her favourite Ma Lai Gao... so, after searching for sometime i found this recipe with fermentation and the look definitely very close to the one we had at Tim Ho Wan (Ma Lai Gao )...This is definitely not a quick recipe, it takes at least 1 1/2 days before you can enjoy the labour of your love. 

What I did was to make the starter paste on Wednesday night, let it ferment for 24 hours. Then add the rest of the ingredients (except baking powder and bicarbonate soda) on Thursday night, let it ferment overnight in fridge and steam them on Friday morning.

I did not reduce much sugar for this recipe as sugar is the "food" for the yeast!

The texture is soft and fluffy but doesn't have as much air pocket as the one served at Tim Ho Wan. Taste-wise, according to my MIL and SIL who are die hard fan of Tim Ho Wan's Ma Lai Gao, they said its nice but if compare to Tim Ho Wan, it lacks a certain unique taste, they are guessing  maybe Gula Melaka? I am not too sure but will definitely give it a try with Gula Melaka and see if it works :)

** UPDATED: Upon hubby's request, made a second batch. This time round, i fermented for 48 hours instead of 24 hours. The texture is softer this time with more air pocket, also it takes shorter time for steaming to achieve the brown colour, 1 hour compare to the previous 1.5 hours.

***UPDATED AGAIN: Received a feedback recently that Tim Ho Wan Steamed Egg Cake doesn't use yeast as fermentation. Instead they used natural fermentation... so far, i haven't find a recipe that uses this other way of fermentation but if i do, i will try it out and share :)

INGREDIENTS:

Starter paste
1. 160g of Hong Kong Flour
2. 35g white sugar
3. 1 teaspoon of instant yeast
4. 75ml of warm water

Hong Kong Flour-low protein flour
Cake mixture
1. 150g of white sugar
2. 35g of bread flour
3. 35g of custard powder
4. 20g of milk powder
5. 5 eggs
6. 50g of melted butter
7. 100g of vegetable oil (tasteless oil)

Before steaming
1. 1 1/2 teaspoon of baking powder
2. 1/2 teaspoon of bicarbonate soda

METHODS:

Starter paste
1. Mix flour, sugar, yeast and water together to form a dough (as shown)
2. Place the dough in a bowl and cover with cling wrap (Do note that the dough will increase in size about 2-3 times so put in a bigger bowl).
3. Let it ferment at room temperature for 12-48 hours. ( I ferment mine for 24 hours but i did notice that after 12 hours there is not much changes in the paste in term of size so i guess that is why the minimum time to ferment is 12 hours)


Initially, this is how the dough looks like after mixing the ingredients together.
Cake mixture
1. After 24 hours, you will notice that the paste has become more soft will lots of hole and has at least increase in size by 2-3 times (as shown)

After 24 hours of fermentation
Closer look-can see a lot of hole
And this is how it looks like inside, lots of air pocket
2. Sieve the flour, custard powder and milk powder. Set aside
3. Place the starter paste in the mixing bowl and mix using a stand mixer at low speed for 1-2 minutes (I do not advice using hand mixer because it was quite hard to mix as the mixture is quite sticky based on my personal experience)

Mixing the starter paste
4. Add sugar and beat for 2-3 minutes on low speed until sugar is incorporated.
5. Add flour mixture spoonful by spoonful and beat to mix well. Once the dough started to get really sticky, add one egg. Then continue to add more flour and beat, adding eggs in between once it gets too sticky.
Super sticky mixture
6. After all the flour is added, add the remaining egg, one by one and mix well.
7. After all eggs are incorporated, scrap the side and bottom of the mixture as a lot of thick mixture still stick to the sides and bottom. 
8. Turn the speed to medium and mix for 5-10 minutes until the mixture smoothen. 
9. Add butter and oil, mix well at low speed.

After adding eggs, butter and oil, mixture is smoothen.
10. Cover with cling wrap and ferment in fridge overnight or 12-24 hours.
11. After 12 hours of fermentation, you can see that the mixture thickens slightly, also can observe a lot of small bubbles. There is no significant change in size after second round of fermentation.

Bubbles forming after overnight fermentation
Thicken mixture, compare to pre-fermentation overnight in fridge
12. Before steaming, add bicarbonate soda and baking powder. Pour into a bowl and steam. Do note that the cake will rise to almost double its size.
13. Steam for 1 to 1.5 hours or until the cake turns brown.
Slowly, the yellowish cake is turning brownish
14. Do not attempt to open the lid at least 30 minutes during the initial steaming stage. Monitor water level and add if required.
15. Cool down for 5-10 minutes, cut and serve.
16. Enjoy and have a piece!

Have a piece, or probably more :)

Tuesday, August 26, 2014

Cook: (For Banana Lovers) Low Fat Low Sugar Banana Cake


Difficulty: 3/5

After my last successful attempt on low fat low sugar banana cake, today decided to give it another try and this time round, i increase the amount of banana by 50% cause hubby is a super banana fan and he commented that the cake will be nicer with more bananas :) 

I also further reduce the sugar due to the higher banana ratio as the bananas are quite sweet!

Indeed, the cake turns out to be yummy! For this is the recipe for all banana lovers out there!

For those who just wanted a mild banana taste, this is the previous recipe link: http://eatplaycook22.blogspot.sg/2014/06/cook-low-sugar-low-fat-banana-cake.html

INGREDIENTS:
(Make one 9 inches square cake)

1. 3 medium sized eggs
2. 40g brown sugar
3. 315g of ripe banana (i used 3 large bananas)
4. 180g cake flour
5. 0.6 teaspoon of baking powder
6. 0.3 teaspoon of bicarbonate soda (baking soda)
7. 70g of vegetable oil


METHODS:

1. Sieve flour, baking powder and bicarbonate soda and set aside.
2. Whisk eggs, brown sugar and banana at high speed until the mixture double its initial amount, turns from bright yellow to pale yellow and the mixture is thicker than initial stage (as shown in picture). It is similar to a ribbon stage whereby you can see ribbon forming when you whisk.

Initial stage when all ingredients just combine together..(after 1 minute of whisking)
Continue whisking until the amount doubled, ribbon stage and colour changes to pale yellow as shown
3. Fold in the flour mixture using a spatula.
4. Add in oil and mix well. The mixture should turn glossy at this point. 
5. Pour into baking tin lined with baking paper and bake in preheated oven 160 degree celcius for 30-35 minutes ( i used 33 minutes) or until fork comes out clean when poke into cake and the top turn brownish.

Ready to go into oven
6. For decoration, i place one cookie cutter on top of the cake, dust some icing sugar and garnish with some fresh fruits. Pretty and yummy!
Some decoration to make the cake more appealing :)

Friday, August 15, 2014

Cook: No Bake Mini Oreo Cheesecake (No Added Sugar)


Oreo Cheesecake
My attempt of decorating... hehe.. looks funny!
Difficulty: 2/5

One block of the cream cheese that I bought during a promotion few months back is expiring soon, so  I look at my existing food supply and decided to make Mini Oreo Cheesecake.

As it is a relatively easy cake to make, it is also a good chance to involve my kids during the assembling. It can helps them to learn follow instructions and help them to practice their motor skills.
Kiddos' version
Kiddos' version-side view
I made use of my muffin tray to mould the Mini Oreo Cheesecake.

INGREDIENTS
(Make 8 Mini Oreo Cheesecake)

1. 24 Oreo Chocolate Cream Biscuit Crumbs (Crush into crumbs by placing the Oreo into plastic bag and crush using rolling pin)
2. 50g of butter
3. 250g of cream cheese, soften to room temperature
4. 1/3 teaspoon of vanilla extract
5. 200g of whipping cream
6. 9 Oreo Biscuit (Remove cream in middle, and break into medium pieces)

METHODS:

1. Place 1 1/2 tablespoon of Oreo Crumbs into each muffin hole.
2. Melt butter and place 1 tablespoon of melted butter into each muffin hole.
3. Mix well, and press down the biscuit mixture using the back of a spoon.
4. Chill in fridge for at least 1 hour.
5. Whip the whipping cream using mixer until medium peak. Set aside.
TIPS: Use high speed for 3-5 minutes or until the cream thickens, then reduce to low speed until it reached medium peak. This is how it will looks like: Medium Peak Whipped Cream.
6. Mix the cream cheese and vanilla extract until it is well combine.
7. Add the whipped cream into the cream cheese mixture and mix well for 1-2 minute until the mixture looks smooth. Do not over mix.
8. Add half cup of the Oreo Crumbs and all the Oreo biscuit pieces into the mixture. Fold in until just combine.
9. Scoop the mixture into the muffin hole and smooth the top using the back of a spoon.
10. Sprinkle the remaining Oreo Crumbs onto the top.
11. Chill in fridge overnight or at least 4 hours.
12. Serve chill.

Yummy!