Autumn is considered one of my favourite season. As the leaves changes colour and gets ready for winter, the weather is considerably pleasant and the colourful mountains are pleasing to the eyes.
This autumn, we make our way to explore Transylvania, which not only made famous of Count Dracula but also home to large community of brown bears amidst the wonderful landscape and friendly people. Our trip this time is for 7 nights in which 5 nights will be spend in our trusty campervan.
It is our first campervan experience. We have learned so much during this trip and even met a family who has been staying in campervan, touring Europe for the past 1.5 years. All of us adapted to our mobile home, cooking meals on the go, manoeuvre through the city in our bulky car, and the happy faces when get connected to the mall free wifi (most of the wifi in Romania is without password). At the end of the trip, when we checked in to a proper hotel, everyone is grateful for unlimited hot water shower, huge bathroom and proper bed, indeed a great learning experience.
 |
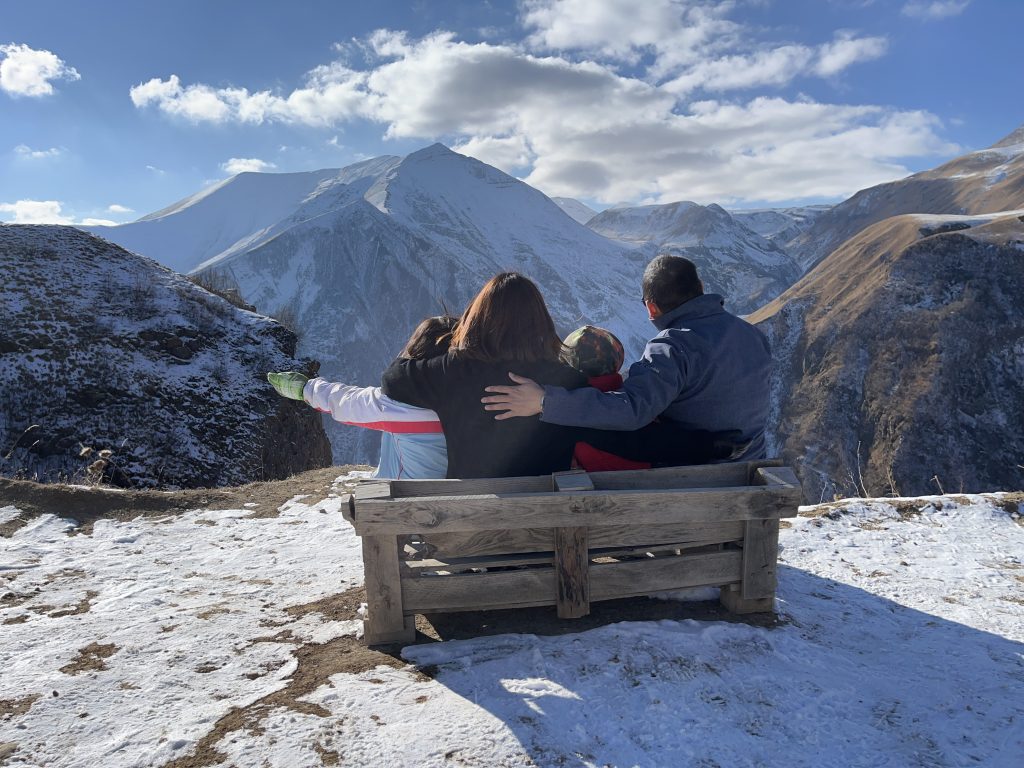
| Balea Lake, Transfagaran Highway |

Some tips for campervan:
- It's important to manage the water level in the tank, for us we use water wisely and our tank is good enough for 2 days of shower, toilet and cooking. Hence, we only go to campsite once every 2 days to fill our water.
- Campsite in Romania cost around RON 100-150 per night for 2 adults 2 kids including electricity. Some campsite provides self use washer and dryer at additional cost. We camped at Vampire Camping and Ananas Camping during our trip.
- In Romania, you can discard the grey water as long as its to the ground, they are not strict on that but do check as some country has more strict policy when it comes to discarded the grey water.
- For the toilet, we added a tablet and it is good enough for 2 days. We try to use toilet in mall, and petrol station whenever possible and we never use our toilet for big business. The waste water is not smelly as what we would have imagine so the toilet tablet is super effective.
- Romania allows wild camping so as long as you are not blocking the way, there is usually no issue. There are couple of days we slept in the carpark of huge hypermarket and use their toilet facilities in the morning.
- On the first day, we bought a selection of food for breakfast, lunch and dinner, so whenever needed, we can whipped up easy lunch or dinner while visiting attractions. Example, we make hotdog bun and instant noodle for lunch and pasta for dinner.
- When visiting town centre, best to park campervan just outside of city (we usually park at retail park such as Auchan, Declathon, Jumbo etc) and take an Uber into the city as it is difficult to park a huge campervan in the city.
 |
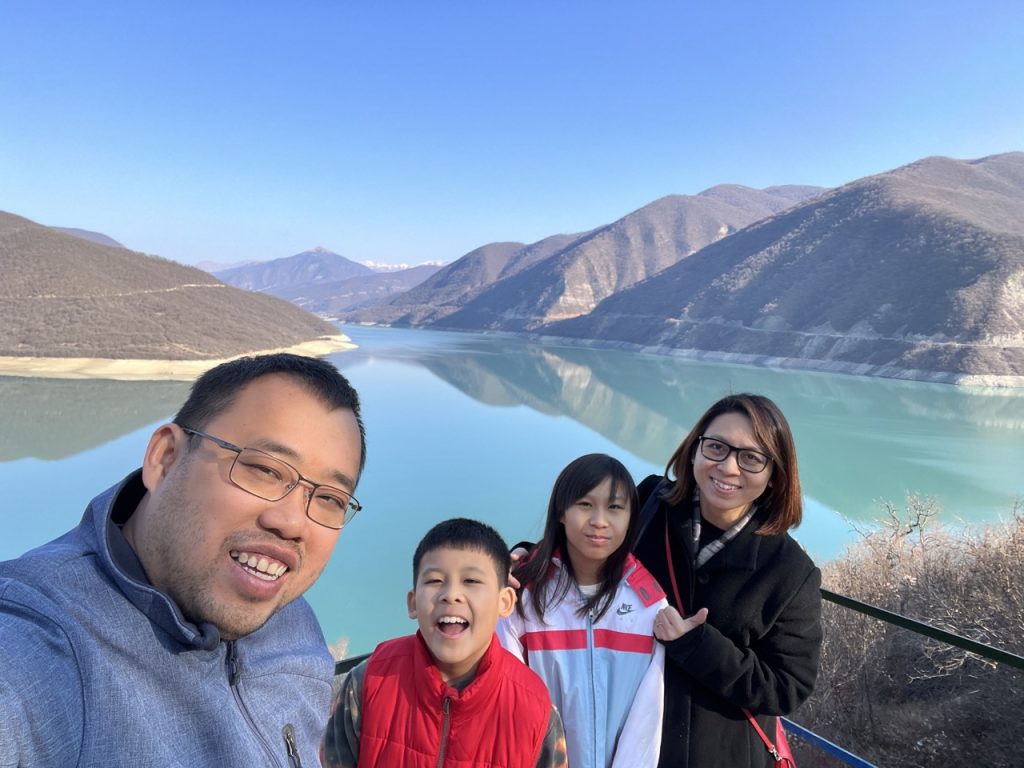
| Transfagaran HairPin Drive |
- Peles Castle- a fairylike castle build for the first king of Romania. Set amidst beautiful forest backdrop, it is a nice walk up to the castle. The interior of the castle is very well maintained, exquisite woods carvings and from the garden, you can get very nice view of the castle. Entrance fees : RON 50 adult, RON 12.5 for students (this is price for the ground floor visit). RON 50 for parking.
- Bran Castle- made famous by a book called Dracula by Bram Stolker. It is free to explore the castle ground, to enter the castle it cost RON 60 adult and RON 15 for students. Build as a fortress, it later become residence for Queen Marie. The parking here is exorbitant (RON 60 per hour so we just find a roadside space and park there)
- Brasov town- walk around the town, passed by Black Church, had lunch at Le Cauen at town square and stroll around Tampa Mountain.
- Clay Castle of Fairies. It is a instagrammable place, mini castle made of natural ingredients- clay, stones and straw. But to be honest, it is quite small and not worth the detour. Cost RON 20 per person- same price for children. RON 10 for parking.

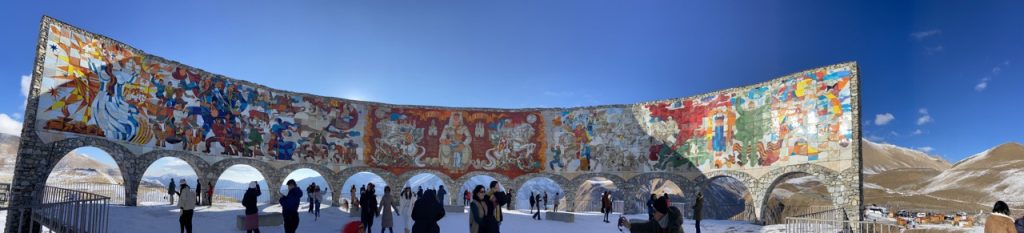
Sibiu town- known also as the city of eyes, check out their roof as the city watches you.- Transfagaran Highway- only open end June to early November due to the extreme weather in the mountain. We were lucky to be able to explore this highway, the view is so great, no wonder dubbed as one of the best view highway in the world. We make our way through the hairpin drive (made famous by Top Gear) and head to Lake Balea (RON 20 for parking), the highest water body in the area. We also saw many wild brown bear on the way, they are just too adorable!
- Royal Court of Targoviste, where Vlad held his royal court. RON 15 for adult and RON 8 for students.