Thursday, May 23, 2019

Cook: Turnip Cake (萝卜糕)


Homemade Turnip Cake

Crispy outside and soft inside

Since moving to Dubai, not every street food is readily available. When I am in Singapore, if I wanted a nice plate of turnip cake, I can just walk across the road and reach a hawker centre where I can indulge in them at a very reasonable price. However in Dubai, not everywhere serve nice turnip cake, and the price is definitely much more expensive when compared to Singapore.

So I decided to take some my own to see how easy/hard it is. I am pretty happy with the results as it turned out good for my first attempt. Although I took quite a long time shredding the turnip, but it is all worth it.
The ingredients required
INGREDIENTS (Makes 8 servings)

1. 2 radish/turnip --around 1kg 
2. 2-3 cups of water
3. 2 tablespoon of dried shrimp, soaked and chopped
4. 6 pieces of dried mushroom, soaked and chopped
5. 2 pieces of Chinese sausage, chopped into small pieces
6. 2 stalks of spring onion, chopped into small pieces
7. 230g of rice flour
8. 2 tablespoon of cornstarch 
9. 1 teaspoon of salt
10. 1 teaspoon of sugar
11. White pepper to taste

METHODS:

1. Grate the turnip and add two cup of water to the turnip.
2. Place them in a wok and simmer until the turnip is cooked, stir it every now and then so that the turnip doesn't turn brown.
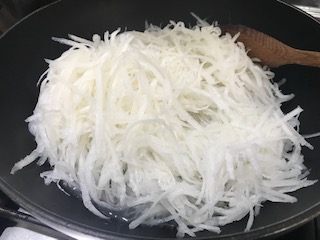

3. Once it is cooked, scoop the turnip and squeeze the juice out. Place the turnip in a bowl and the juice in a measuring cup. Top up the cup with water so that you have two cups of water/juice.


4. Pour the water back to the turnip and let them cool down.
5. Meanwhile, add some oil to the wok and stir fry the Chinese sausage, dried shrimp, mushroom until they are cooked, then add in the spring onion and a little bit of soy sauce. Set aside. 


6. Now that the turnip is cooled down, add rice flour, cornstarch, salt, sugar and white pepper. Mix well. The mixture should look a bit like watery coleslaw.
7. Place the mixture into a steaming bowl. Do remember to oil the bowl so that the carrot cake doesn't stick to the side and easier to remove it after steaming.

8. Steam for 50 minutes and leave it to cool down to room temperature.


9. At this point, you can cut them up and pan fried.


10. If you would like the texture to be harder and easier to cut, it is best to leave them in the fridge for a couple of hours or overnight. 
11. Enjoy!


Tuesday, January 15, 2019

Cook: My Successful Sausage Bread Recipe


Soft and fluffy even after a few days
I have experimented with a couple of sausage bread recipe and they always don't stay soft after 1 day. But I did not gave up and finally I found this recipe that works. The bread is good for 3-4 days and they still tasted great.

INGREDIENTS (Makes 8 sausage bread):

1. 2 and 1/2 cup of plain flour
2. 7g of instant yeast
3. 2 tablespoon of sugar
4. 1/4 teaspoon of salt
5. 1/2 cup warm milk
6. 1/4 cup warm water
7. 2 tablespoon of butter , melted (I use the microwave)
8. 8 hotdogs
9. 1 egg plus 1 teaspoon of water (for egg wash)
10. Some cheese sauce on top

METHODS:

1. In a mixing bowl, add plain flour, yeast, sugar and salt.

Mix the dry ingredients 
2. Using a second mixing bowl, mix milk, water, melted butter and egg using an electric mixer with a dough hook.
Mix the wet ingredients well

3. Then slowly add the dry mixture into the wet mixer while mixing them.
4. If the dough is too dry, add a little bit more water and add flour if its too wet.
5. Place the dough into an oiled bowl and cover with a damp cloth.

Place the dough in oiled bowl
6. Allow the dough to rise into double its size, usually takes around 1-2 hours.
7. Deflate the dough and knead. Then divide into 8 equal portion.

Cut into 8 portions

8. Roll out each portion flat until it can cover the hotdog. Wrap the hotdog and cut off the extra dough.
Roll the dough flat and place the hotdog on top
Wrap the sausage in the dough

9. Using a scissors, cut the sausage along the dough while leaving the bottom of the dough in tact.
Cut and shape the bread
10. Push each segment of the hot dog in opposite direction and press it down gently.
Place on baking tray

11. Brush the surface with egg wash and add some cheese sauce on top.
12. Bake in preheated oven at 200 degree Celcius for 15 minutes until it's done. 

Its done!

Tuesday, November 6, 2018

Cook: OMG Super Yummy Chocolate Cookies


Super good chocolate cookies! I am addicted. 
My first attempt and the chocolate cookies are so good! Totally gonna make another batch soon.

INGREDIENTS (Makes 24 cookies): 

1. 380g of plain flour
2. 1 teaspoon of baking soda
3. 1 teaspoon of sea salt
4. 227g of unsalted butter (at room temperature)
5. 90g of brown sugar
6. 1 teaspoon of vanilla extract
7. 2 eggs (at room temperature)
8. 2 cups of chocolate chips

METHODS:

1. Using an electric mixer, beat the butter and brown sugar until creamy. 
2. Add the vanilla extract and eggs. Then beat until it is well combined. 
3. In another bowl, combine the flour, baking soda and salt. Slowly add in the flour mixture into the butter mixture while combining them using an electric mixer. 
4. The dough should looks like the picture below when it is done. 

My cookie dough is ready
5. Then add in the chocolate chip and combine using your hand. You can substitute the chocolate chip with M&M also.
6. Then place the dough into a plastic wrap and refrigerate for 24-72 hours. You can refrigerate and bake them in batches over a few days if you would like to have nice and warm biscuit for breakfast, brunch or tea time.

Place the dough in the fridge to "marinate" it so that it is more flavourful
7. Remove the cookie dough from the refrigerator and let the dough sit at room temperature until it is soft enough to mould.
8. Roll them into a ball shape and press down the cookie using a spoon to make it slightly flatter.
9. Bake in preheated oven (180 degree Calcius) for 12-15 minutes. 
10. When the edges turn slightly brownish, it is done.
Smells heavenly 
11. Serve warm or keep in airtight jar for up to 5 days but I assure you that it will be gone before that :)

It taste amazing!

Wednesday, October 10, 2018

Cook: Doraemon's Dorayaki with Red Bean

Doraemon's favourite
Recently kids was reading Doraemon's comic book in our attempt for the kids to learn Mandarin in a fun way. They get to know that Doraemon loves Dorayaki so after making some red bean paste (https://eatplaycook22.blogspot.com/2018/09/cook-red-bean-paste.html), I decide to make some Dorayaki for afternoon tea. Kids love them and even finish off the extras after dinner. 

I love the pretty brown colour on the skin and the trick is to control the oil used when making the Dorayaki. 

INGREDIENTS (makes 6 Dorayaki):

1. 4 medium sized eggs
2. 40g white sugar
3. 2 tablespoon honey
4. 160g of plain flour
5. 1 teaspoon of baking powder
6. 1-2 tablespoon of water (adjust according to the texture of the mixture)
7. 500g of red bean paste 

METHODS: 

1. Place the eggs, sugar and honey into a large mixing bowl. Beat them until fluffy (as shown).

Beat the mixture until fluffy
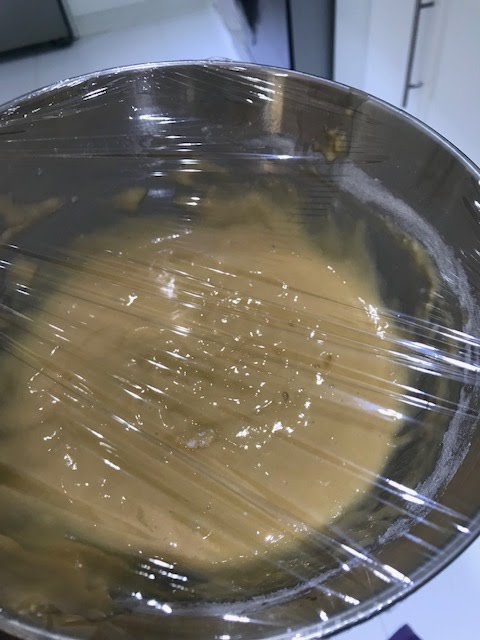
2. Add the plain flour and baking powder. Mix well and cover with cling film.
3. Place into fridge to rest for 15 minutes.
Cover with cling film and put into the fridge
4. Add in 1-2 tablespoon of water. Its ready when the mixture is smooth and runny as shown.
Add water until mixture is slightly runny
5. Using a kitchen towel, oil the surface of a non stick pan on low heat. Only apply a very thin layer of oil.
Place on an oiled pan
6. When bubbles form on the surface of the batter, flip over. You should get an even pretty brown colour.

7. Cover the Dorayaki in damp towel to prevent drying while continue to make the rest of the Dorayaki. 
8. Place red bean paste in between two pieces of the Dorayaki pancake. 
9. Serve and enjoy!

Cook: Sticky Rice Cake with Red Bean Fillings

Sticky rice cake with red bean fillings
I have made some red bean paste and it serves as a good base for making different afternoon tea snack. Made some red bean bun previously and Dorayaki. Today I have made sticky rice cake that is filled with red bean paste, its served warm and tasted great.


Red bean paste is also available commercially but I find them too sweet at times. Its not hard to make the paste, it's just time consuming. 

INGREDIENTS (makes 6 pieces):

1. 125g glutinous rice flour
2. 1/3 to 1/2 cup of water
3. 3/4 cup of red bean paste
4. some sesame seed

METHODS:

1. Weight 125g of glutinous rice flour into a mixing bowl.
2. Slowly add water and knead to form a dough (will use between 1/3 to 1/2 cup of water). The dough formed should be easy to shape and does not break when it's shaped. 

Dough is ready 
3. Divide the dough into 6 equal portions, rolled into a sphere shape. 
4. Take each portion and flatten them as shown.
Flatten the dough
5. Add the red bean fillings in the middle and close it up.
Add fillings
Close up the edges
6. Flatten the sticky rice cake slightly on top of the sesame seeds.
Add sesame seeds
7. Add one tablespoon of oil into a non stick frying pan. Pan fried the sticky rice cake until it turns golden.
Pan fried
8. Serve warm. Enjoy!
Its ready...nice and warm

Tuesday, September 25, 2018

Cook: Red Bean Paste


Red bean paste is a great ingredient in many food. It can be used in making red bean bun, mooncake, and various kueh. It is time consuming, but easy to make at home. There are also commercially available red bean paste but making your own means you gets to control the amount of sugar inside it :)

INGREDIENTS (Makes around 330g of red bean paste):

1. 120g of red bean
2. 40g sugar
3. A pinch of salt
4. Water (as required)

METHODS:

1. Place the red bean in a container. Rinse a few times until the water is clear. Cover with water and soak overnight. 

Soaking red bean
After one night, the red bean absorbed most the water.
2. Place the red bean into a pot and cover with water. Let it boil and then simmer for an hour until it is soft. Watch the stove and add water as required. Do not add too much water, add water little by little just to cover the beans.


3. After an hour, remove from stove and let it cool down.


4. Blend the cooled red bean into mash. Then add sugar and salt.
5. Place the pot back onto the stove and keep stirring until the sugar melts and the paste is not watering.


6. Let it cool down and use it in making your favourite food. Otherwise keep in fridge for up to a week or freezer for up to a month.

I made bun :)

Monday, July 2, 2018

Cook: Easy hand mix Blueberries Apple Muffin


Have a blueberries apple muffin for afternoon tea...
Whipped up a quick and easy muffin for kiddy's snack when they get home. No hand blender is required and ingredients are readily available in my kitchen. Great recipe and definitely a keeper. Very yummy, moist in the centre with crunchy and pretty browned top.... I already had a piece and craving for more!

INGREDIENTS (Make 6 large or 8 medium-sized muffins):

1. 1 1/2 cup of plain flour
2. 1/8 cup of sugar plus a bit extra sugar for the muffin top
3. 1/2 teaspoon of salt
4. 2 teaspoon of baking powder
5. 1/3 cup of canola oil
6. 1 egg
7. 1/3 to 1/2 cup of milk 
8. 1 teaspoon of vanilla extract
9. 1/2 cup of blueberries
10. 1/2 cup of cut apple (cube size)

METHODS:

1. Place flour, sugar, salt and baking powder in a bowl.
2. Using one measuring cup, place oil and egg. Then add milk until 1 cup.
3. Then add the vanilla extract and give it a whisk.
4. Add the oil, egg, milk and vanilla extract mixture slowly into the dry bowl containing the flour, sugar, salt and baking powder.
5. Using a fork, combine the ingredients. The batter will be quick thick as shown. Do not overmix. 


6. Add the fruits and combine them.

Ready to go into muffin tray
7. Place the muffin into muffin tray and sprinkle the top with some sugar.
8. Bake in a preheated oven at 200 degree Celcius for 10-15 minutes until the top is golden brown. You can check if the inside is cooked by pricking with a wooden stick. If it comes out clean, then it is done.

Moist in middle and crunchy on top...
9. Enjoy! Best serve warm....


10. Once its cooled down, keep in airtight container and consume within 2-3 days.