 |
| Melt in the mouth Pineapple tarts |
 |
| Yummy! Really melt in the mouth |
I have never attempted pineapple tarts before because based on previous experience making them with my aunt, my thoughts are there are quite a lot of steps in making (making pineapple paste or choosing a good store bought one..., hard work of incorporating cold butter cubes into flour and most of the time, they one that we make was not really nice, kinda hard)
Had a gathering with one of my friends just before Chinese New Year and she gave me a bottle of homemade pineapple tarts and it really melts in the mouth. Both hubby and me finished the whole bottle of pineapple tarts in less than a day. So I decided to request the recipe from my friend, she uses this recipe from
Nasi Lemak Lover, and it is actually pretty easy steps with minimal ingredients so decided to give it a try. It truly melts in the mouth and my relatives all give thumbs up! Definitely a keeper for next year Chinese New Year cookies making.
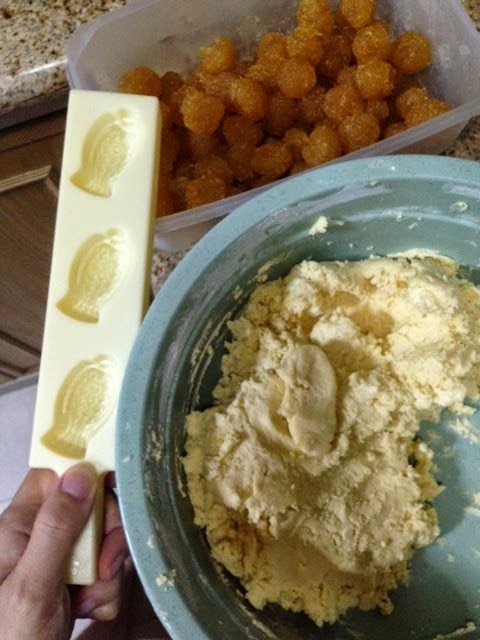
Do note that this recipe's dough is quite soft so not suitable for moulding with mould, rather it is only suitable for shaping into ball shapes. I tried using my pineapple-shaped mould but failed so can only make them into ball.
INGREDIENTS:
(Makes 70 medium sized pineapple tarts)
1. 650g pineapple paste ( I bought ready make Bake King pineapple paste from NTUC in Singapore)
2. 350g salted butter (at room temperature)
3. 510g plain flour (Use Top Flour for finer texture)
4. 100g condensed milk
5. 2 egg yolk
To finish
1 egg yolk and 1 tablespoon of fresh milk for brushing (optional, i didn't use)
METHODS:
1. Roll the pineapple paste into balls (about 8g each- I use roughly gauge by eye, didn't use weighing machine)
2. Cream butter and condensed milk using medium speed hand mixer until the mixture turns pale and creamy as shown. It takes a bout 5-10 minutes)
 |
| Cream until pale and creamy |
 |
| Texture as shown |
3. Add eggs, mix for another 1-2 minutes until all incorporated. The mixture's texture will become slightly thicker as shown.
 |
| After addition of eggs |
4. Sieve the flour and add into the butter mixture above. Mix well using hand until dough is soft and not sticky (able to mould into ball-shaped using hand)
 |
| Dough ready to shape |
 |
| Wanted to use mould initially but dough too soft, can only shape into ball-shaped |
 |
| Dough soft but able to mould into ball |
5. Mould dough into ball shaped and then flatten them, add one pineapple paste ball and wrap the dough around the pineapple ball. Roll them into ball and placed on baking tray. I did some simple design using butter knife.
6. Bake in preheated oven 165 degree celsius for 20-25 minutes or until top is slightly browned. I took about 23 minutes.
 |
| Ready to go into oven |
7. Remove from oven and let them cool down before storing in airtight container. Able to keep for at least 2-3 weeks.
 |
| It is ready! Yum! |
Definitely a keeper for me for Chinese New Year next year... and before i pen off, Happy Chinese New Year and enjoy the remaining week of Lunar Chinese New Year!


No comments:
Post a Comment